My first tutorial - Borders
1) Open up your Adobe Photoshop
2) Open the picture/graphic you wanna have the border

3) Make a new layer (Ctrl+Shift+N / Layer > New > Layer)
4) Click on the Magic Wand on your tools window

5) Make sure you have selected your new layer

6) Use your Magic Wand and select any area on the new layer

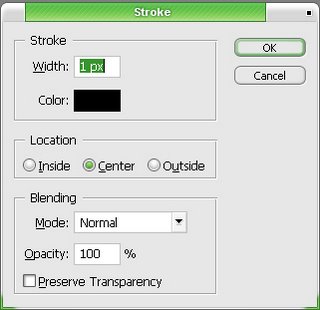
7) Go to Edit > Stroke
8) Choose 1px for the smallest border, however the size is up to you. Colour of your choice. And click okay.

9) Parts 9-11 are totally optional : Deselect (Ctrl+D) and choose Magic Wand the inner part of the border. Edit > Stroke. Choose a different colour and 1px for the border. Repeat 2 times.
10) Deselect (Ctrl+D) and Magic Wand the inner part of the "unbordered" area. Edit > Stroke. Choose the same colour of the first border. Deselect.
11) Use your Magic Wand and select the middle border. Hit Delete. And there! You have a nice 3px border!
Results:

PSD:
Still uploading. Lol.
That's all. I'm still new in this. Comment and rate my first tutorial.
![[ Heassion ] ♥](https://blogger.googleusercontent.com/img/b/R29vZ2xl/AVvXsEiywgDSGZ7efEt4hJmkiY-tnpoJOmLqWj9oDU3MpksEo4-b85UcNccwlS90ToYBKIgSnnqk57K3H3Avdi7UCIfMkSTp3pJq-SusPfZla8S2dIzFQ_sPfE0xanvqg4d589Noqkb7/s1600-r/grass_header.jpg)

No comments:
Post a Comment